Fix Your Boot Wearing Problems With These Easy Ways On How To Tie Hiking Boots
Author

Javier Olivo is a blogger and a writer by heart. In the past, Javier worked as a woodcarver in a furniture store in his hometown. Being exposed to the outdoors, he often likes to give advice to people who prefer trekking in the woods. During his free time, Javier loves going to the gym and playing football.
There must be two types of people right now reading this blog. First, the inquisitive ones who are wondering if there are actually different WAYS to tie the hiking boots. Second are the ones, who have recently started with this new adventurous activity and want to learn this new stuff.
From whatever category you belong, there’s one thing you must understand that tying the laces of your school shoes versus tying them while going out for a hike or trek is completely different. Though there are a lot of ways you can knot the laces of your shoes according to the size of your foot, injuries, or blisters. Here we will discuss some common ways to do so.
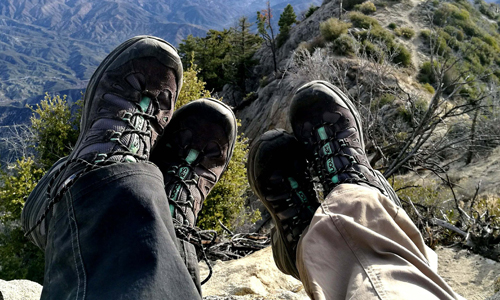
Walk comfortably without tipping off while climbing those mighty mountains and hills.

The Surgeon’s Knot
This is the best way to tie the knot that holds the laces in place and prevents heel slip. The correct way to do it is:
- Instead of crossing and continuing with the regular way of tying the laces, what you need to do is, take both the laces and loop them as if you’re going to tie them down there.
- Now, loop it again, which should seem like you’re looping it again and pull the laces tight.
- Continue up and repeat the same process. The laces will look like they’re locked and prevent your foot from slipping a lot.
- When you’re done with this, you can tie the laces as you would normally do.
- Make a loop, bring it around and make a knot properly.
That’s how you tie a surgeon’s knot and this will always secure your foot in the boot.
The Heel Lock Lacing
This type of lacing is done when you get blisters on your feet or maybe cannot feel it inside the shoe.
- Look for those extra holes on the side of the shoes that we often ignore. Now, use those holes to create a loop on both sides.
- Insert the lace backwards to form a small loop. This should be done both inside and outside as we are going to use these loops to execute the locks.
- Now, you have loops on both sides. Cross the laces to insert into the loop of the opposite side.
- Now first, you need to pull them down toward the shoe and knot up, which will create a tight and firm lock.
- Lastly, you can tie the laces you would normally do.
This is how you do with the heel lock lacing that will help prevent any foot movement inside your boot.
The Window Lacing
This kind of lacing is done when your properly tied boots starts to cause a pressure point on your foot’s top. Tying the boots the window lacing way can help solve your problem.
- What you need to do is, start unlacing your hiking boots down those hooks that are present just below the pressure point.
- Go directly to the next hook and re-lace. Now, you can cross the laces over for a better and comfortable fit.
- There you can tie your boots you would do regularly OR you can make a surgeon’s knot at the upper and lower edge of the window for a tighter grip.
This simple technique is a saviour for hikers with high insteps.
Final Words
So there you are with simple and effective ways of tying the hiking boots. Practice them at home or while going for a short walk, so the next time when you’re on the journey for a long hike, your boots will fit in a better way and ensure a comfortable walk.
Author
Javier Olivo is a blogger and a writer by heart. In the past, Javier worked as a woodcarver in a furniture store in his hometown. Being exposed to the outdoors, he often likes to give advice to people who prefer trekking in the woods. During his free time, Javier loves going to the gym and playing football.
Categories
- Sport (28)
- Product Reviews (3)
- Team Outdoor Look (7)
- Mike Wild (2)
- Mike Payton (2)
- Suse Hammond-Pears (3)
- Snowboarding (12)
- Latest Offers (105)
- Shop Talk (1)
- Competitions (7)
- Walking (413)
- Lifestyle Fashion (8)
- Travel (86)
- Kit Guides (176)
- Workwear Clothing (6)
- Safety Workwear (4)
- Health/Fitness (289)
- Skiing (91)
- Great Outdoors (1316)
- Cycling (92)
- January 2025
- December 2024
- November 2024
- October 2024
- September 2024
- August 2024
- July 2024
- June 2024
- May 2024
- April 2024
- March 2024
- February 2024
- January 2024
- December 2023
- November 2023
- October 2023
- September 2023
- August 2023
- July 2023
- June 2023
- May 2023
- April 2023
- March 2023
- February 2023
- January 2023
- December 2022
- November 2022
- October 2022
- September 2022
- August 2022
- July 2022
- June 2022
- May 2022
- April 2022
- March 2022
- February 2022
- January 2022
- December 2021
- November 2021
- October 2021
- September 2021
- August 2021
- July 2021
- June 2021
- May 2021
- April 2021
- March 2021
- February 2021
- January 2021
- December 2020
- November 2020
- October 2020
- September 2020
- August 2020
- July 2020
- June 2020
- May 2020
- April 2020
- March 2020
- February 2020
- January 2020
- December 2019
- November 2019
- October 2019
- September 2019
- August 2019
- July 2019
- June 2019
- May 2019
- April 2019
- March 2019
- February 2019
- January 2019
- December 2018
- November 2018
- October 2018
- September 2018
- August 2018
- July 2018
- June 2018
- May 2018
- April 2018
- March 2018
- February 2018
- January 2018
- December 2017
- November 2017
- October 2017
- September 2017
- August 2017
- July 2017
- June 2017
- May 2017
- April 2017
- March 2017
- February 2017
- January 2017
- December 2016
- November 2016
- October 2016
- September 2016
- August 2016
- July 2016
- June 2016
- May 2016
- April 2016
- March 2016
- February 2016
- January 2016
- December 2015
- November 2015
- October 2015
- September 2015
- August 2015
- July 2015
- June 2015
- May 2015
- April 2015
- March 2015
- February 2015
- January 2015
- December 2014
- November 2014
- October 2014
- September 2014
- August 2014
- July 2014
- June 2014
- May 2014
- April 2014
- March 2014
- February 2014
- January 2014
- December 2013
- November 2013
- October 2013
- September 2013
- August 2013
- July 2013
- June 2013
- May 2013
- April 2013
- March 2013
- February 2013
- January 2013
- December 2012
- November 2012
- October 2012
- September 2012
- August 2012
- July 2012
- June 2012
- May 2012
- April 2012
- March 2012
- February 2012
- January 2012
- December 2011
- November 2011
- October 2011
- September 2011
- August 2011
- May 2010
- April 2010
- March 2010
- February 2010
- January 2010
- November 2009
- October 2009
- September 2009
Submit a Comment