Pitch Your First Tunnel Tent in Minutes
Author

Chris shares his passion for cycling, hiking, skiing, and climbing from Buxton, in the Peak District. As a blogger for Outdoor Look, Chris shares outdoor tips and indoor tricks to help you get the most out of your time spent outside. When he's not out adventuring he's making videos or trying to keep up with his 4-year-old son.
 Unlike older tents, the newer ones are much simpler and easier to pitch. Tunnel tents are one of these. They require minimum efforts to pitch, even for a beginner. Some manufacturers provide detailed instructions on their website and even guiding videos to help you pitch the tent. You can begin by reading of those instructions before following up with simple steps that are mentioned below.
4 simple steps to pitching your first tunnel tent in a few minutes:
- Finding a perfect location and laying the tent out
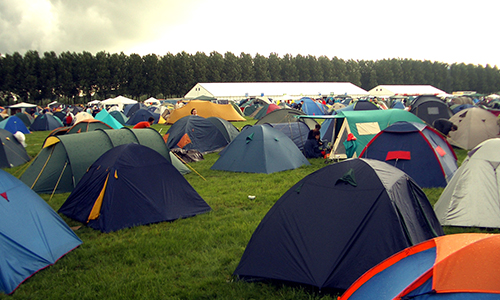
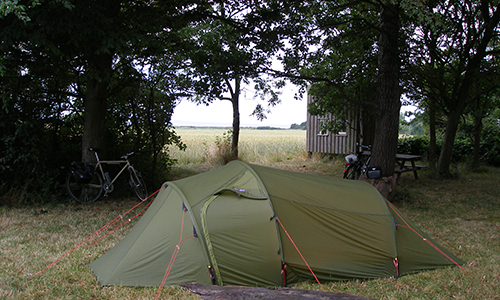
Find as flat ground as possible and remove all stones, twigs, and other sharp objects from the ground. Areas with dints should be avoided as the water can fill in these dips. Avoid putting up a tent under a tree. As much as it might seem tempting, setting up a tent under a tree will end up in loud dripping water, falling leaves, and twigs. Heavy wind can cause more harm by breaking bigger branches.
It is always a good idea to carry tent footprint to prevent wear and tear of the tent against the ground. It will also help you to keep the tent clean. You can also set up tarps to protect the tent from rain and sun. Flame retardant, heavy duty tarps are also available for coverage against fire and wind.
- Unroll the tent and insert tent poles
Place the bag of poles first when unrolling the tent. This will help in compressing the air out and create a tighter tent. Once, the tent is completely pulled out, peg the front and corner of the tent to help it stay put while you insert the poles.
All the poles are generally of the same size so it does not matter which pole inserts in which channel. In other cases, manufacturers will colour coordinate the channels with their poles to ensure that you get it right.
Begin with the main section and later proceed to porches and other parts of the tent.
- Pull the tent and lift it upright
 This might feel like a tricky part, since tunnel tents are usually heavier than other smaller tents. You might want a helping hand if you are pitching a large tent. You can lift the roof section while the other person clips the fasteners to the pole.
However, if you are going to pitch the tent alone, ensure that you have unzipped the door for air to easily fill in the tunnel tent.
In case you are pitching the tent in a windy area, begin with erecting the front of the tent first. Place the pole end on the pin system and tighten the webbing adjuster. Place the rest of the poles.
Close the door before pegging the poles to ensure that the tent is pitched tight.
- Open all ventilations
Once pegged, open all the vents to avoid condensation.
There you go – 4 simple steps that will help any first-timer in putting up a tunnel tent within few minutes.
Author
Chris shares his passion for cycling, hiking, skiing, and climbing from Buxton, in the Peak District. As a blogger for Outdoor Look, Chris shares outdoor tips and indoor tricks to help you get the most out of your time spent outside. When he's not out adventuring he's making videos or trying to keep up with his 4-year-old son.
- Speed Up Your Post-Hike Recovery with These 6 Essential Tips
- Cycling through Tranquil Roads and Coastal Views on the Isle of Wight
- The Essential Guide to Hiking Safety: 5 Tips Every Hiker Should Know
- Run Smart, Run Strong: Your Guide to Injury-Free Running
- Embrace Biking: Essential Tips for Beginners
Categories
- Sport (28)
- Product Reviews (3)
- Team Outdoor Look (7)
- Mike Wild (2)
- Mike Payton (2)
- Suse Hammond-Pears (3)
- Snowboarding (12)
- Latest Offers (105)
- Shop Talk (1)
- Competitions (7)
- Walking (413)
- Lifestyle Fashion (8)
- Travel (86)
- Kit Guides (176)
- Workwear Clothing (6)
- Safety Workwear (4)
- Health/Fitness (289)
- Skiing (91)
- Great Outdoors (1316)
- Cycling (92)
- January 2025
- December 2024
- November 2024
- October 2024
- September 2024
- August 2024
- July 2024
- June 2024
- May 2024
- April 2024
- March 2024
- February 2024
- January 2024
- December 2023
- November 2023
- October 2023
- September 2023
- August 2023
- July 2023
- June 2023
- May 2023
- April 2023
- March 2023
- February 2023
- January 2023
- December 2022
- November 2022
- October 2022
- September 2022
- August 2022
- July 2022
- June 2022
- May 2022
- April 2022
- March 2022
- February 2022
- January 2022
- December 2021
- November 2021
- October 2021
- September 2021
- August 2021
- July 2021
- June 2021
- May 2021
- April 2021
- March 2021
- February 2021
- January 2021
- December 2020
- November 2020
- October 2020
- September 2020
- August 2020
- July 2020
- June 2020
- May 2020
- April 2020
- March 2020
- February 2020
- January 2020
- December 2019
- November 2019
- October 2019
- September 2019
- August 2019
- July 2019
- June 2019
- May 2019
- April 2019
- March 2019
- February 2019
- January 2019
- December 2018
- November 2018
- October 2018
- September 2018
- August 2018
- July 2018
- June 2018
- May 2018
- April 2018
- March 2018
- February 2018
- January 2018
- December 2017
- November 2017
- October 2017
- September 2017
- August 2017
- July 2017
- June 2017
- May 2017
- April 2017
- March 2017
- February 2017
- January 2017
- December 2016
- November 2016
- October 2016
- September 2016
- August 2016
- July 2016
- June 2016
- May 2016
- April 2016
- March 2016
- February 2016
- January 2016
- December 2015
- November 2015
- October 2015
- September 2015
- August 2015
- July 2015
- June 2015
- May 2015
- April 2015
- March 2015
- February 2015
- January 2015
- December 2014
- November 2014
- October 2014
- September 2014
- August 2014
- July 2014
- June 2014
- May 2014
- April 2014
- March 2014
- February 2014
- January 2014
- December 2013
- November 2013
- October 2013
- September 2013
- August 2013
- July 2013
- June 2013
- May 2013
- April 2013
- March 2013
- February 2013
- January 2013
- December 2012
- November 2012
- October 2012
- September 2012
- August 2012
- July 2012
- June 2012
- May 2012
- April 2012
- March 2012
- February 2012
- January 2012
- December 2011
- November 2011
- October 2011
- September 2011
- August 2011
- May 2010
- April 2010
- March 2010
- February 2010
- January 2010
- November 2009
- October 2009
- September 2009
Submit a Comment